WSUS it will ride on a computer with 1 GB of RAM, 1 CPU and 2 disks (C: \ 20 GB to host operating system, database and page file and D: \ 20 GB where downloaded patches will be placed by default) . With these specifications we have a system update patches for about 300 servers. In the event that the server farm or Workstation you please update from WSUS is higher you will have to create the disk d: \ with a larger size, I recommend that installs SQL Server to host the database on it and you put the base course Data in D: \ as well. DO NOT have to spend.
Start from a base operating system with Windows Server 2008 R2 X64. In the previous article you may know as the base. (In case you do not be a BASE not worry, the steps are exactly the same to install WSUS, but remove from ROLES screen instead of from the beginning of the article (not complicated so do not be alarmed).
Start your machine from the BASE.
After setting the language, click on next. The following screen will appear :

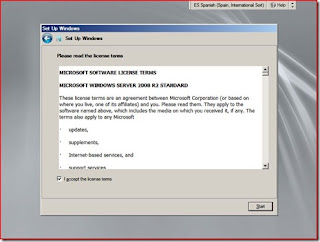
Mark I accept the Licence Terms and Start.
Put the password and click on the blue icon.
Click on OK. Now we have the system booted.
Now change the server name, ip and configure an insert in the domain, remember that the name will have the link to customers so they can download the patches. Ie I move you that we will create a group policy in domain controller and assign it to an OU setting where the server will download the updates that will be created. For example, the server name might be LocalWindowsUpdate. I only say this so that no misunderstanding in the client configuration.
This is where the process really begins Role WSUS installation. First of all we have Internet connection to allow the program to install properly. To test the following file will download and install from the link below:
http://www.microsoft.com/downloads/e...displaylang=en
When we are sure that the server has access to internet:
Click on Add roles
Mark Windows Server Update Services.
Click on Add Required Role Services
nxt
Click on Install
Mark I accept the terms of the license agreement and click on Next.
Here we put the path where you downloaded the Updates. Think of holding a lot and think they are the patches for each language you have in your organization. (I recommend storing it in a drive other than C: \ and thus you can expand at your whim (Remember that Windows Server 2008 now you can resize partitions directly from Windows)).
If not enough space disposable, you also have the option to uncheck the Store updates locally but every time that you have to upgrade a computer to download these patches from Windows Update and the bandwidth of the line is affected. Now modify the unit for which you better go and click on Next.
This screen shows the possibility of letting the web server operating on port 80 or change it by 8530, if the same server and a web server disposals might interest you select the latter option, otherwise click on Next.
We review the summary and click on Next.
Click on Finish.
Depending on whether or not you have automatic updates enabled you see this warning. I will activate it from the control panel and go. Click on Close to complete the installation.


No comments:
Post a Comment