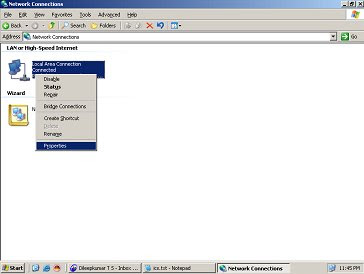
A)Right click the Local Area Connection and take Properties

B)Click the Advanced TAB
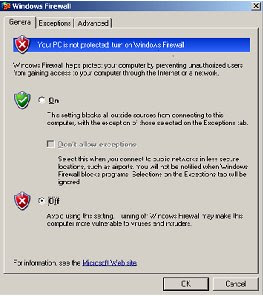
(Windows Firewall) Settings(click this tab)
Off(select this radio button)

Now firewall is turnedoff
2.Right click the existing Dialup connection/Broadband connection
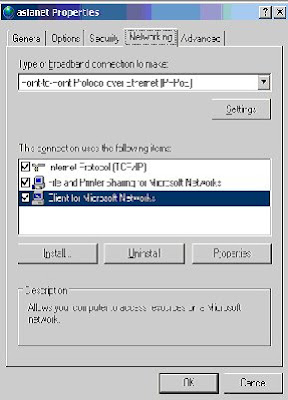
3.Take properties and click Networking TAB
Tick both
File and Print Sharing for Microsoft Networks
Client for Microsoft Networks

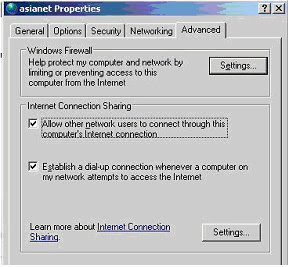
4.Click the Advanced TAB
5.Internet Connection Sharing
Tick must be provided in
{}Allow other network users to connect through this computers Internet
connection.
(when you click this a dialog box will come, just click OK)

6.Now the ICS has been ENABLED
How to Configure the Windows Client
NOTE: Because there are several versions of Microsoft Windows,
the following steps may be different on your computer.
If they are, see your product documentation to complete these steps.
Log on as a member of the Administrators group to set up the Windows
clients that will share the Internet connection.
1. Click Start, click Control Panel, and then double-click Network Connections.
2. Right-click Local Area Connection, and then click Properties.
3. Click the General tab, and then verify that Client for Microsoft Networks
and Internet Protocol (TCP/IP) are displayed and selected.
4. Click Internet Protocol (TCP/IP), and then click Properties.
5. Click the General tab, click Obtain an IP address automatically, and
then click Obtain DNS server address automatically (if these options are not
already selected).
6. Click Advanced, and then make sure that the various lists on the IP Settings,
DNS, and WINS tabs are all empty.
Note that ICS provides these settings.
7. Click OK
Now client machine can access Internet

No comments:
Post a Comment